By Erwin
- Type Plastic
- Brand Master Box
- Scale 1/35
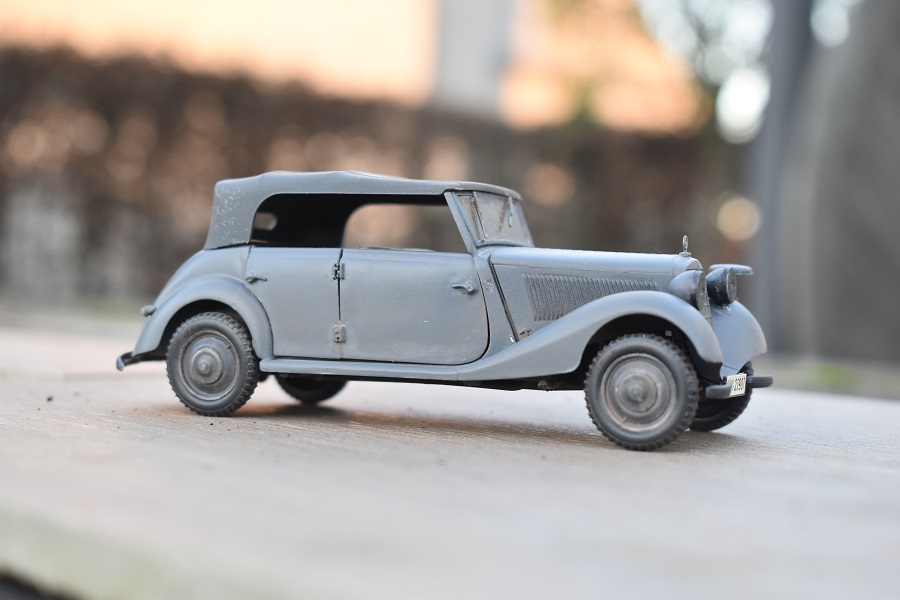
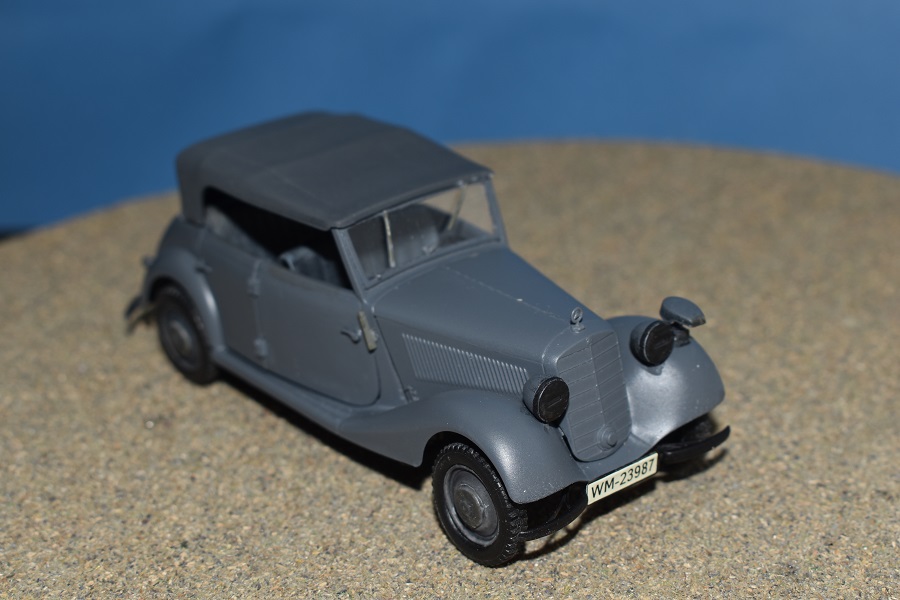
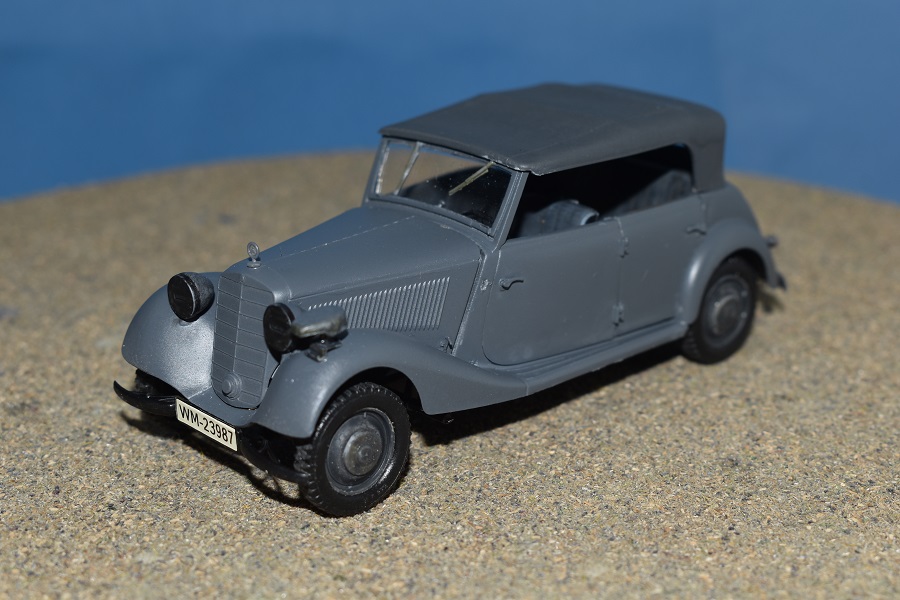
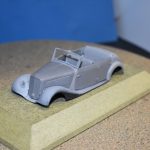
Mercedes Typ 170V, Tourenwagen, 4 Türen.
Also described as a ‘German military car,’ the Type 170V first entered service with the German army in 1937. The vehicle had several special features for its time, such as front and rear suspension consisting of X-shaped oval tubes. It was this suspension system that made the 170V the most widely used vehicle of ‘civilian’ origin in the Wehrmacht. By 1942, a total of 86,615 vehicles were in service. After the war, Mercedes resumed production of the 170V in 1947 because of its reliability in all terrains. Post-war versions were equipped with a 1.7-litre diesel engine.
Specifications:
- Engine: 4 cylinder, 38 HP, 1,697 cc.
- Length: 4,270 mm,
- Weight: 1,100 – 1,160 kg
- Max. speed: 108 km/h
- Fuel consumption: 9.5 – 11.5 L/100 km
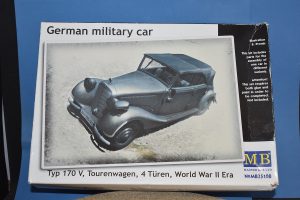
The construction kit:
- Model by Master Box (MB) No. MB35100, scale 1/35.
- Plastic and rubber tyres.
- The instructions are computer-generated but easy to follow.
- There are four sprues and a separate canvas roof in grey plastic and one transparent.
- The decal sheet offers various options.
The construction:
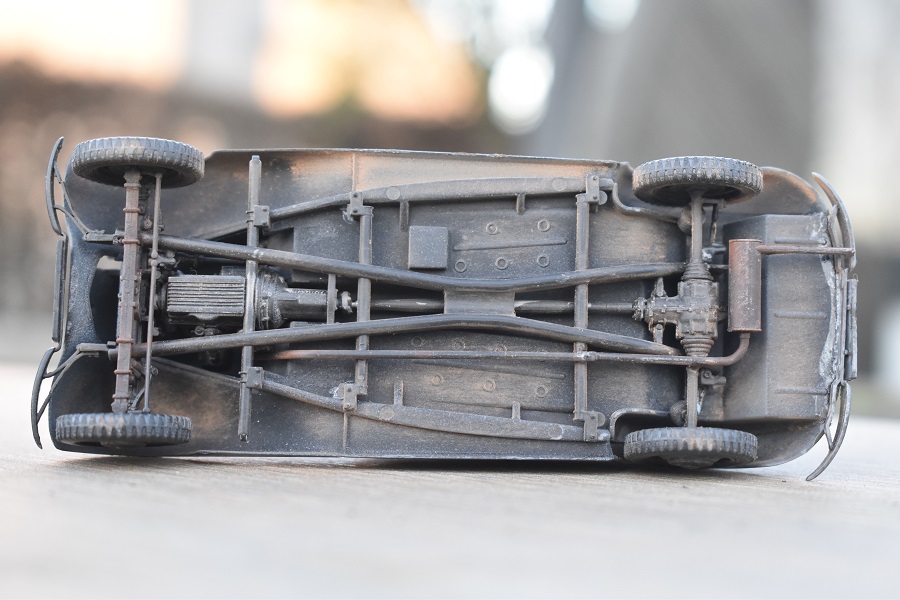
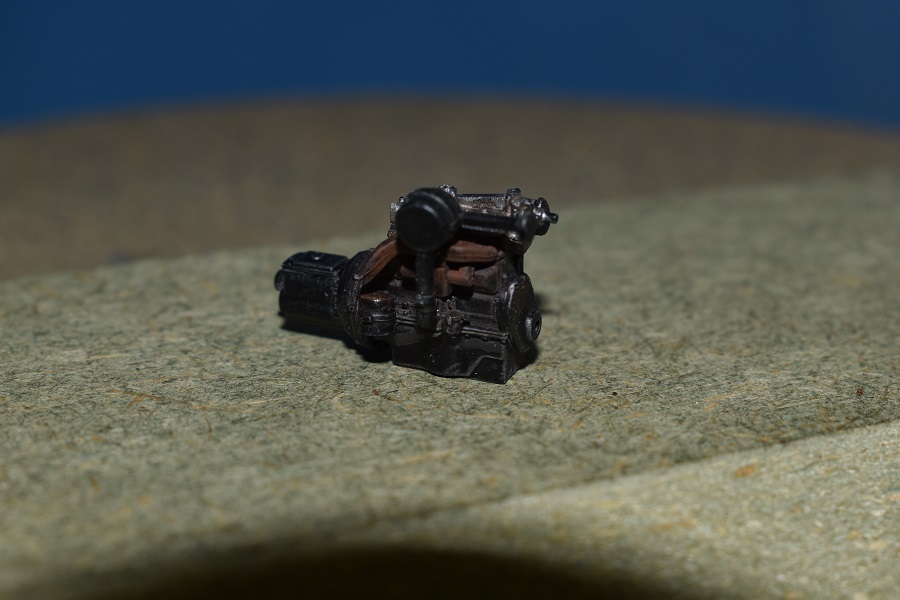
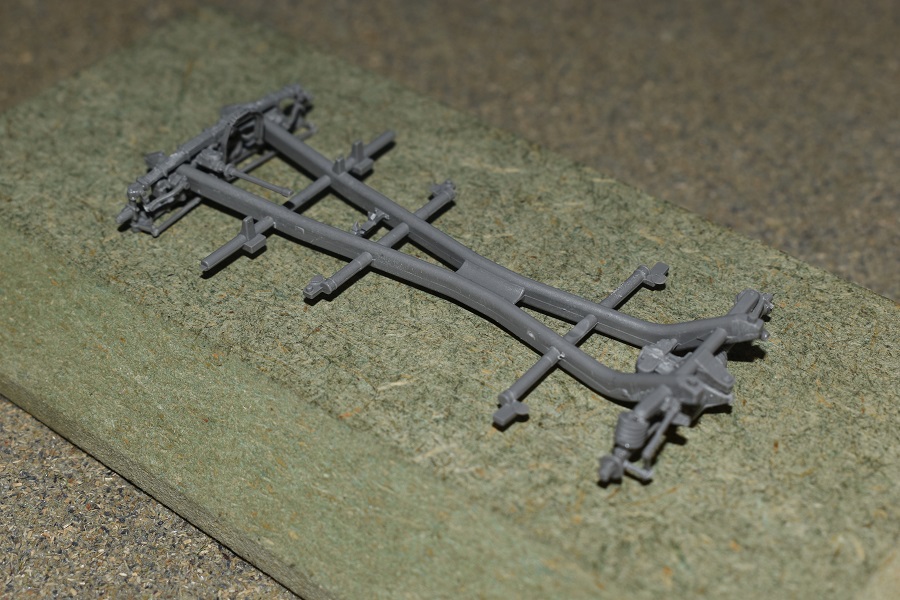
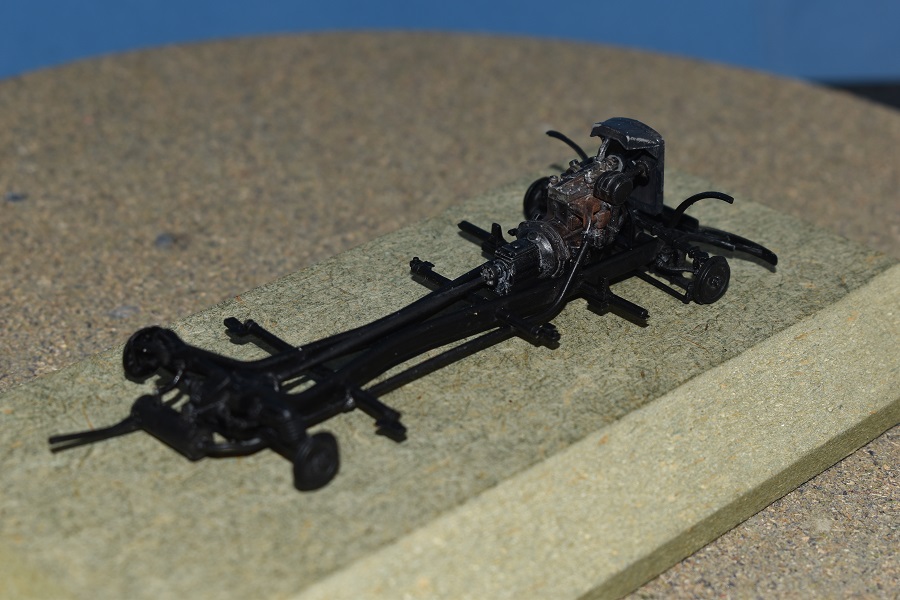
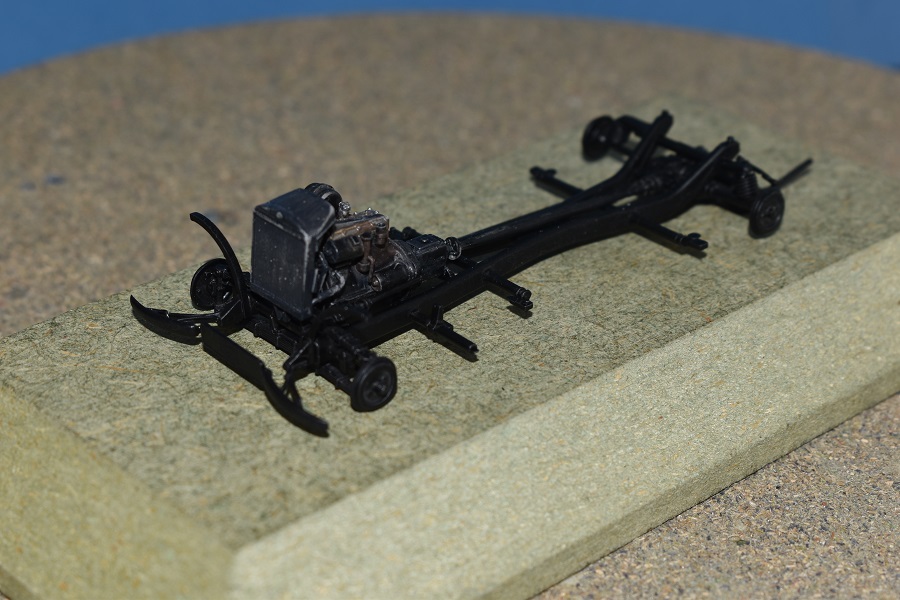
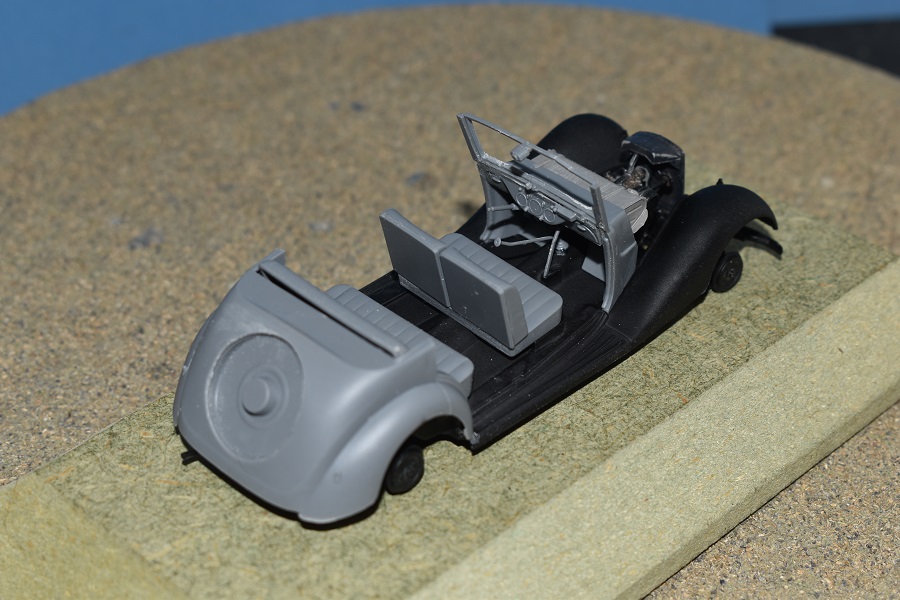
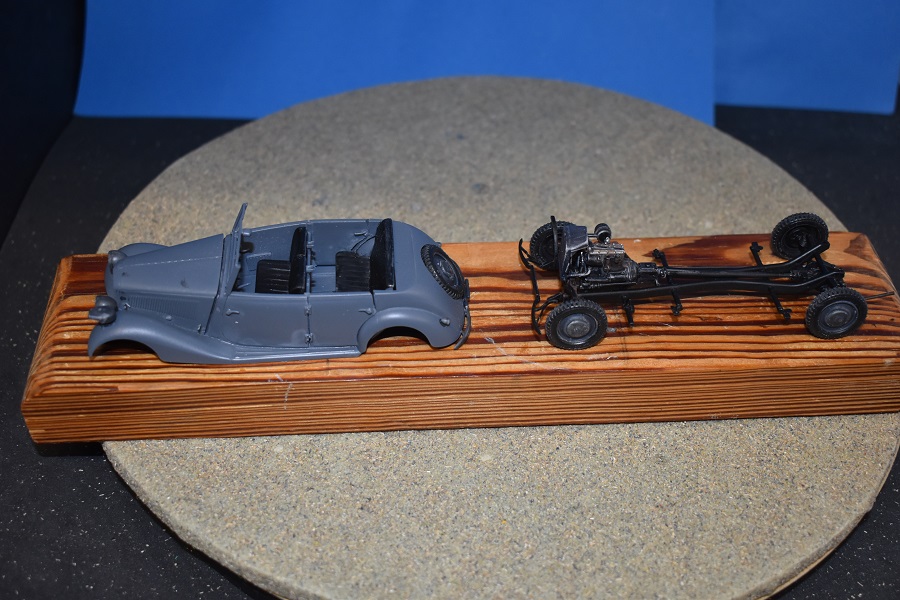
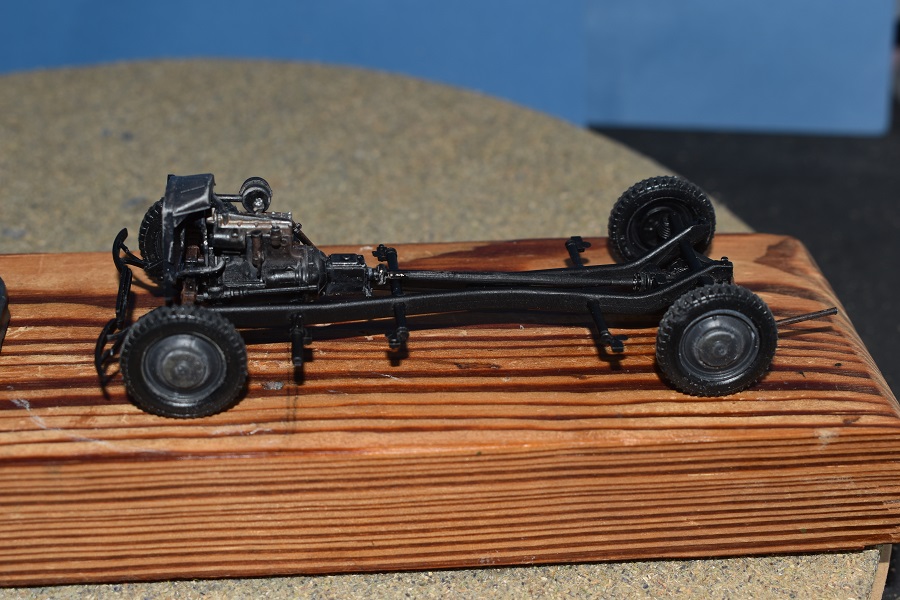
 As is often the case, this starts with the engine, but no colour indications are given. After some research, I painted the block black (Spectrum spray paint) with a metallic valve cover (AK Real Colour Markers). I gave the exhaust a light rust colour (powder). The next phase involves building the chassis, which also goes smoothly if you carefully separate and clean the parts. There were a few breaks in the parts on the sprues themselves, so these had to be repaired first. After applying a grey primer (Spectrum spray can), I did a dry fit with the engine. Once completely finished, the chassis was sprayed black. After this phase, we focus on the body of the vehicle itself, starting with the choice between an early type fuel tank (pre-1939) or the late version from 1939 onwards.
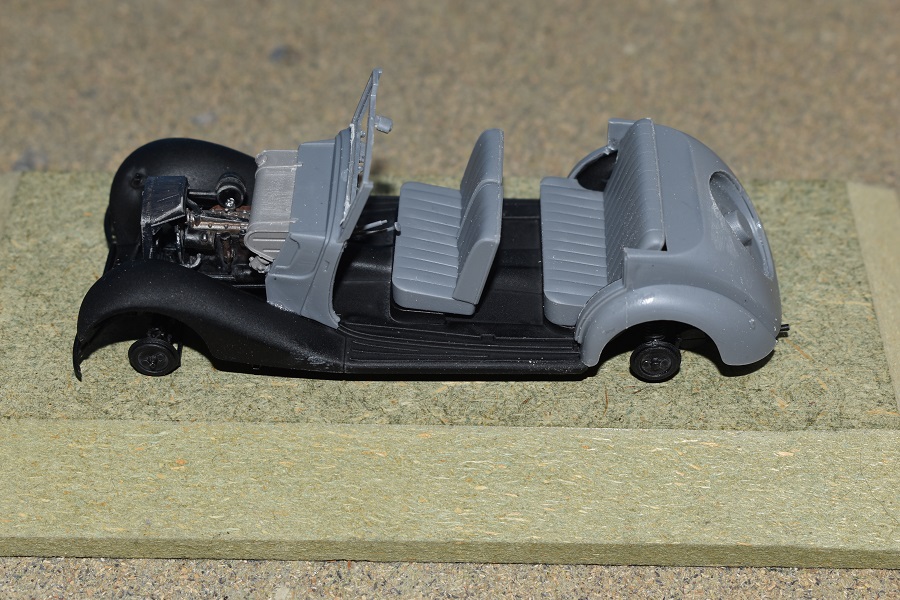
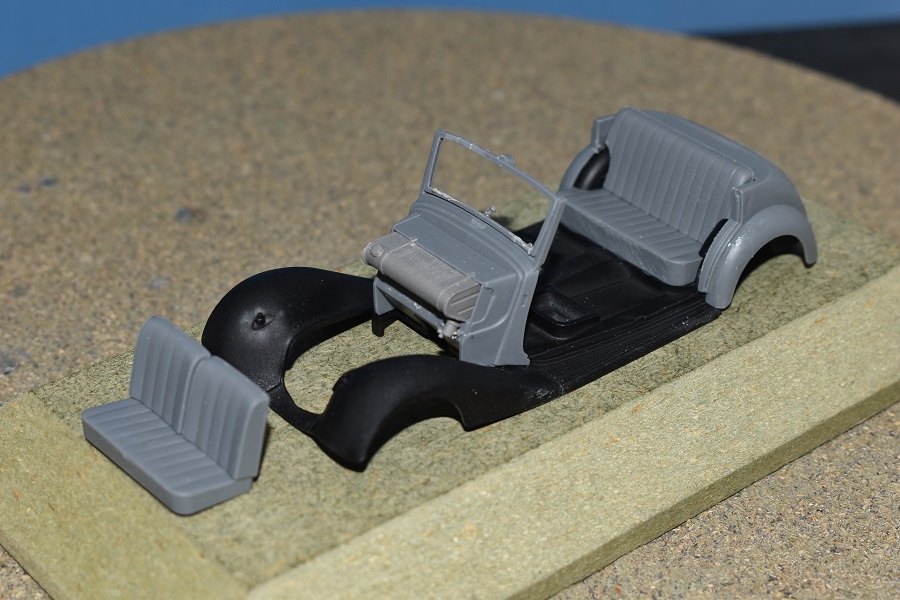
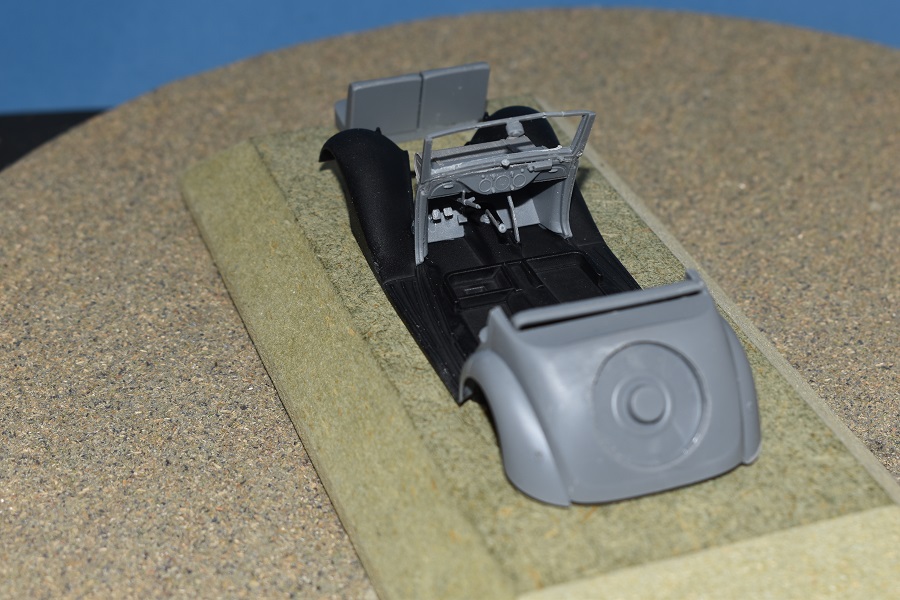
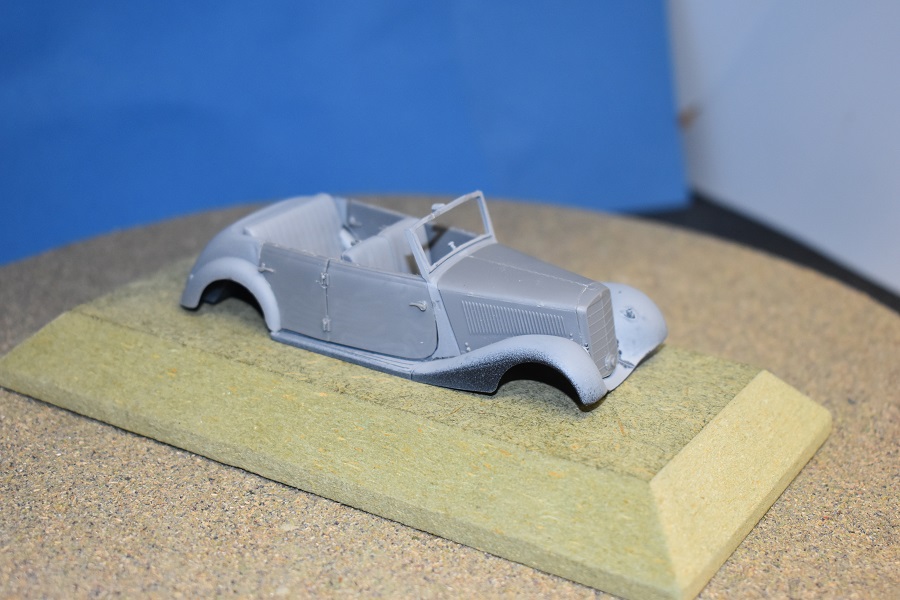
 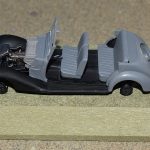 I opted for the latter and mounted it against the bulkhead that separates the engine compartment from the rest of the vehicle. Details are provided for the dashboard and driver’s compartment. The four doors also feature details in the form of door handles on the inside and outside, but I found that the fit of the rear doors left something to be desired and had to make a few adjustments. The seats fit perfectly.
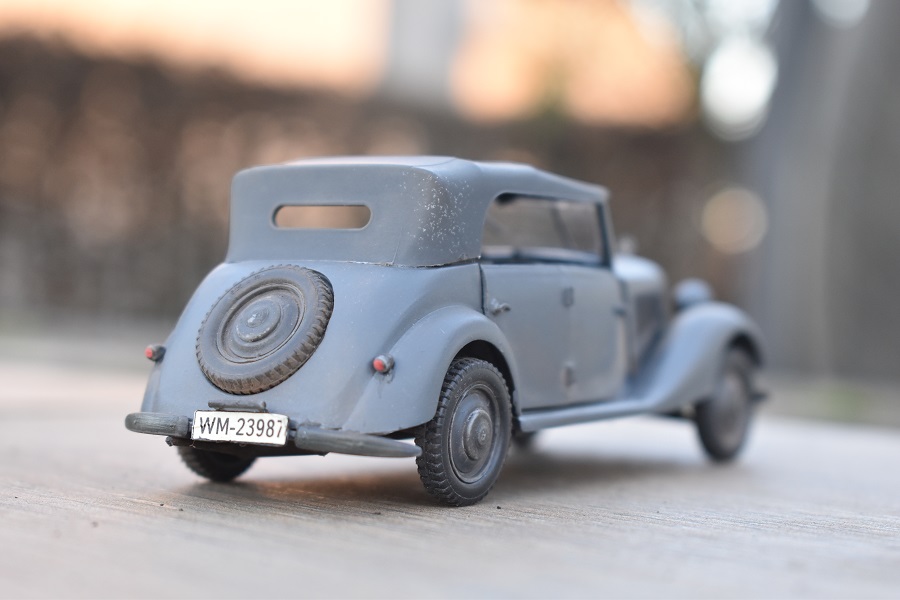
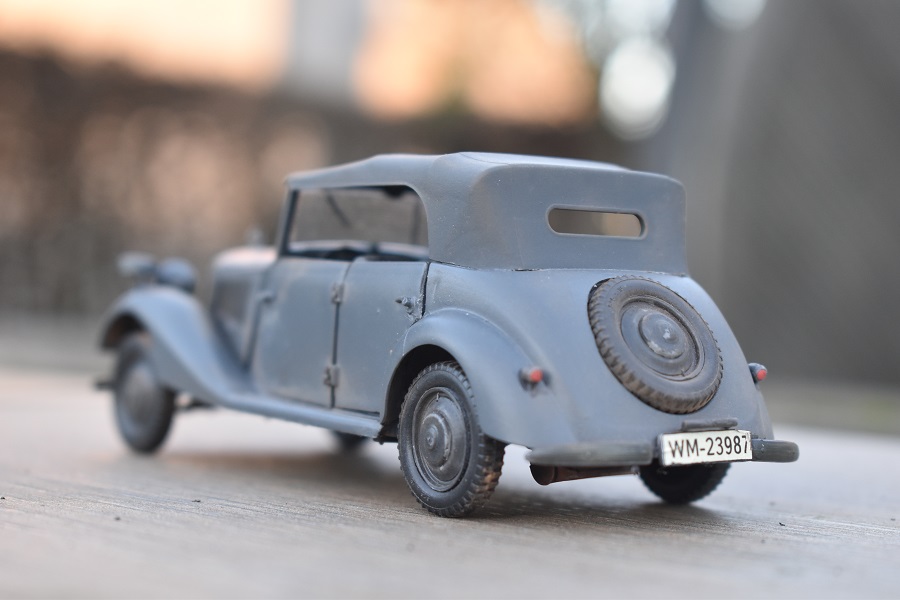
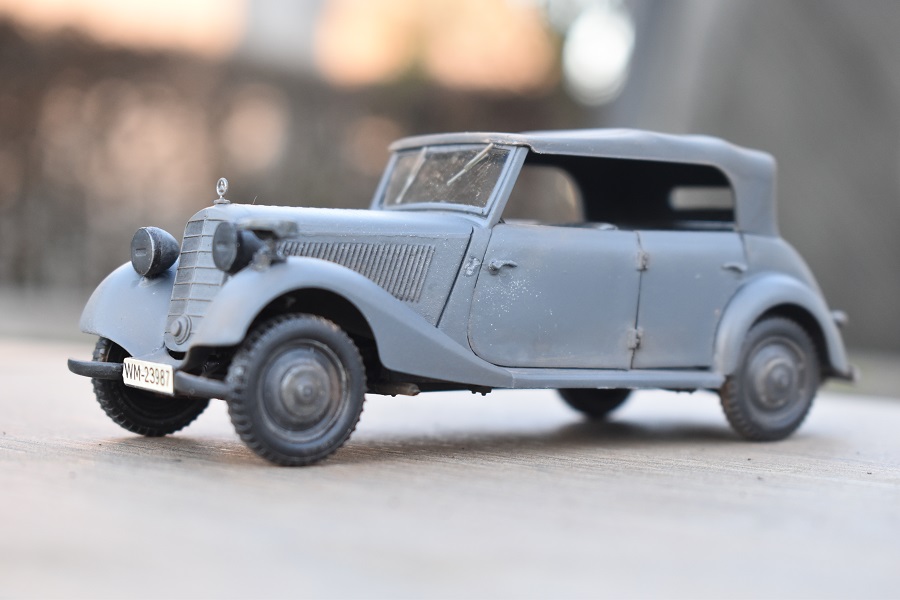
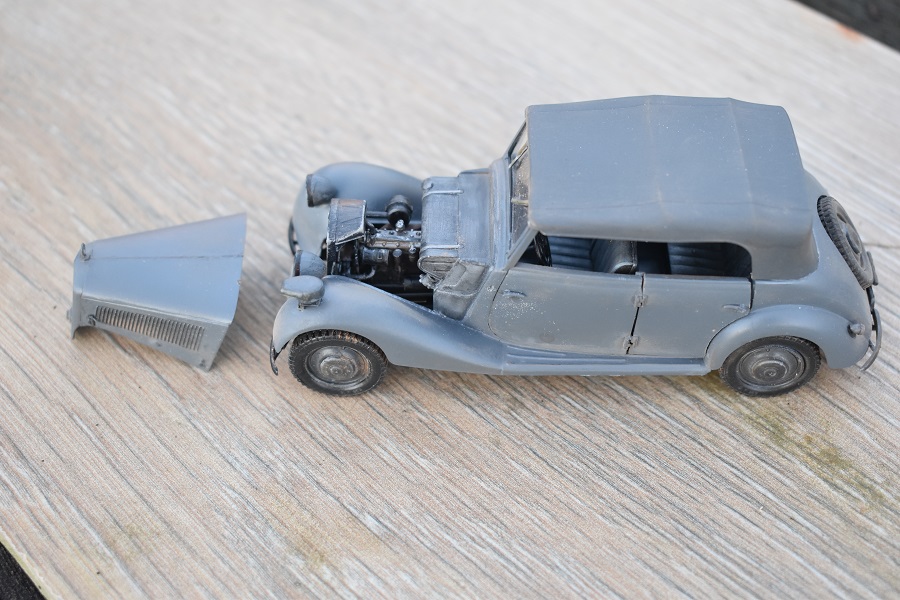
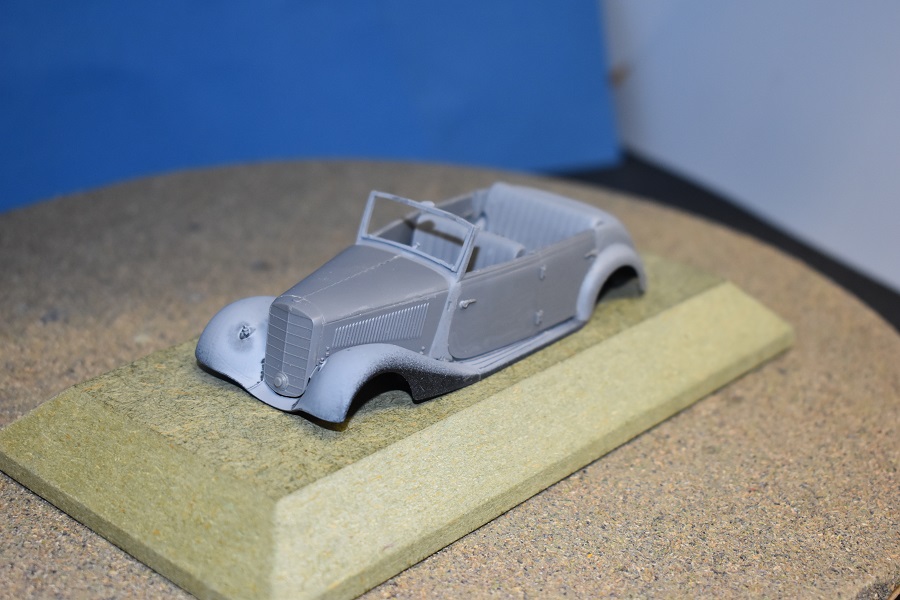
 Since I had not wired the engine, I decided to mount the bonnet closed but still make it completely removable. This also allowed me to maintain the strength of the bonnet, which otherwise could be rather fragile. A grey primer revealed a few flaws that needed to be touched up. The bodywork was then sprayed with Tamiya TS-4 German Grey (spray can), but after drying, spots appeared on the underside of the front doors. Light sanding and a new coat of paint solved this problem. It is strange that this only occurred on the front doors and not on the rest of the vehicle. In the meantime, the chassis was also completely finished with the installation of the wheels. The body and chassis fitted together well and the removable bonnet proved to be a good idea. Note that I glued the bonnet and radiator grille together as one piece. If I had left the radiator grille on the body, the connection would never have looked good. Finally, it was time to fit the canvas roof, for which I opted for the closed version. The reason for this is that I have an almost identical kit from MiniArt, which I would like to build in an open version at some point. The roof only required a minor adjustment at the rear, but otherwise there were no problems. For a bit of colour contrast, I decided to paint the roof in a slightly darker grey.
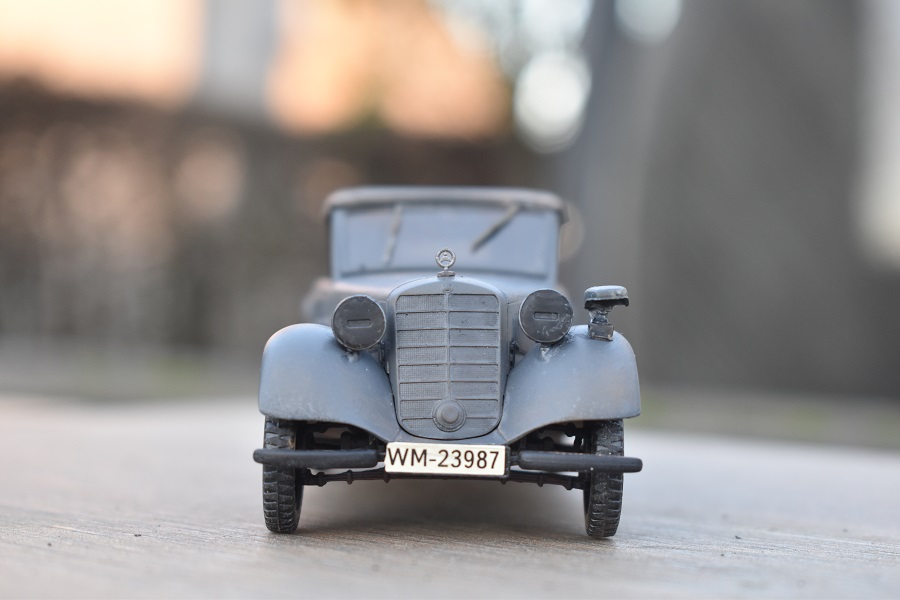
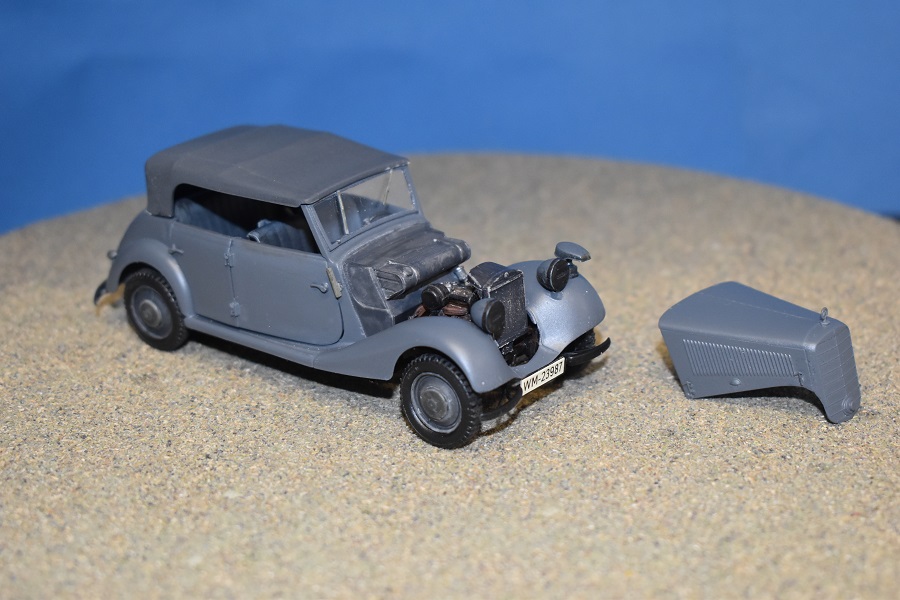
The kit provides a holder for two rifles in the vehicle, which is a nice visible item if you build an open version. However, with the roof closed, the barrel of each rifle sticks out against the roof itself and thus offers resistance. For this reason, both rifles were omitted. Next, it was time to install all the additional parts such as headlights, number plates and the like. A delicate but very nice detail is the Mercedes star on top of the radiator. The final detail is the decals, and here we encountered a slight quality issue. As soon as the decals for the dashboard touched the water, they came loose and you had to be quick to catch them. The decals indicating the tyre pressure, which have to be applied to each mudguard, pulverised and were therefore unusable. In the end, we managed to keep the number plates, but I repeat that they are very delicate and unpredictable. I chose a vehicle in service with the Kriegsmarine, Stationskommando der Nordsee.
PS: the cover of the Notek lamp at the front was replaced and straightened.
Conclusion:
A kit that had been gathering dust for years and was eventually started on the move due to personal circumstances, to be finished later at home. A model that I really enjoyed building because it has a nice level of finish and detail and produces a model that you don’t often come across.
As a lover of military trucks and staff cars, this is a nice addition to my collection.
The final photos were taken in beautiful winter sunshine!
Gallery